In this analysis, I'll show you how I pulled off the logo -> scoreboard transition effect.
The effect
Basically, the scoreboard is revealed in 4x4 pixel increments until the entire scoreboard is present.
1st attempt
Like the blasting and 2 player night mode effects, I wanted to avoid using pixel shaders to keep the code simple by limiting the amount of SpriteBatch changes but also because they weren't around in 1993 so the original team clearly were able to do such effects.
Just to get it in and working, I had done a pretty ugly hack by simply keeping track of which 4x4 area had been shown. This caused the FPS to drop from 60 to 25 on decent hardware. Lode Runner is not a hardware demanding game so this just wasn't acceptable.
Pixel shader
I'll be honest, until starting this game, I'd never needed or written a shader before.
At first glance, I found them confusing and anything more than basic masking still confuses me.
I stumbled upon this helpful blog by Shawn Hargreaves (former XNA developer) that looked promising.
The most interesting effects of all use a custom pixel shader when drawing the rendertarget over the backbuffer. For instance this effect implements a data-driven swipe transition, using a texture to control the swipe pattern. It works by encoding time values into a texture. White pixels will change to display the new screen early on in the transition, while black ones only change later on. The current transition position is set as an effect parameter, and the shader compares that position with the value from the control texture to decide which pixels should be drawn.
I tested the above approach and it was exactly what I was looking for so the next step was to analyse a recording. Unfortunately, Bandicam introduced artefacts and didn't capture every frame (even on high detail) so I wrote a quick app to:
- screenshot the game window every 20ms and save to disk
- iterate over the 214 perfectly captured frames to determine what changed since the last frame and alter the pixels to grey
The colours smoothly fade from white to black since any large change in shade creates a jerky/oddly timed look. I used a simple lerp for this.
grey = Color.Lerp(Color.White, Color.Black, value)
value += 1 / 214
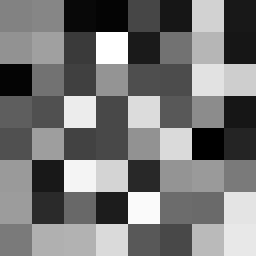
The resulting image is a 4x4 pixel checkerboard with 214 shades of grey which exactly matches the original effect.

Zoomed in portion OR hipster wall art
Check mate
Before you say it, I could have saved myself the trouble of doing any of the above by simply creating random noise BUT it actually helped me to work out the timing. Also, I know I've been making subtle changes here and there but since there was nothing wrong with the original effect, I took the "if I can do, I will do it" approach.
